Showing posts with label Misc. Crafts. Show all posts

Friday, April 4, 2014

Easter~Spring Link Party

It's time for another link party and we thought it would be fun to have an Easter ~ Spring themed one so we not only get holiday ideas but ideas for the season too.
Crafts, Cakes, and Cakes                                   Michelle's Tasty Creations
Facebook                                                          Facebook
Pinterest                                                            Pinterest
                                                                         Twitter
    Hot Eats and Cool Reads                                  MorningNooNight
    Facebook                                                         Facebook
    Pinterest                                                           Pinterst
    Twitter

Monday, September 24, 2012

Candy Corn Vases

Well here is project number two ~ and all in the same week's worth of time, whew!

Do you Pinterest?  I do and sometimes it's plain old addicting, huh?   

I do have one pet peeve with Pinteresters though.  Ya know when you find something you are REALLY excited to pin and you just can't wait until you have the recipe or the tutorial?  

Then you click on the picture and it takes you to......

The dreaded "WHO KNOW'S WHERE LAND" 

Well I have gotten to the point where I won't pin it if I can't get to the original site so I can have directions and give credit where credit is due.  

Anywho, back to my project.  It all ties in I promise :)

I found these totally cute bottles on Pinterest the other day all dressed up like candy corn and I so wanted to make them.  So I clicked on the picture and it took me to ANOTHER picture site, then another and FINALLY I got to The Swell Life (thank the Pinterest Gods) with directions on how to make these
Pin It
Aren't they just the cutest?!  

I had a blast making these and I'm sharing what I did so you can make some too :)

You're welcome.

Here's what I bought
3 different sized vases at Michael's (You can use any bottle or vase for this)
spray paint in white, orange, and yellow

What I used from home
1 disposable rubber glove
1 piece of craft paper

Wash and dry the bottles really good.  If they have a label on them use a label remover or soak in hot soapy water then remove the label and glue then dry.

With the glove on one hand, paint the entire bottle white (I did the bottoms too because I placed them on plastic to dry, this is optional).
 You'll notice I didn't use the glove until AFTER I got white paint all over my fingers. 

Allow to dry completely between coatings.  I only used one healthy coating of paint, but depending on how it sprays on you might need more than one.  Be careful not to get large drips or runs of paint.
 Second is the orange.  I feathered it up on the white and all the way down to the bottom.
Dry completely.
 Lastly came the yellow which I feathered up a little on the orange so there isn't a definite line between colors then all the way to the bottom (including the bottom) and then I let them dry overnight.  
Candy Corn Vases ~ Everyone needs them  

~ Happy Crafting ~

You can find me each week linking up to these wonderful blogs


Thursday, April 5, 2012

Super Simple Easter Centerpiece or Hostess Gift

Here is one of the super simple Easter crafts I threw together this week.  It goes great in any room, on any table, or would be great as a Hostess gift.

Here's what you need:

1 - 5" x 5" x 5" glass jar, I purchased mine at Michael's, they have many options
1 - 12.6 oz. bag plain M&M's
1 - 12.6 oz. bag peanut M&M's
8 flat Peeps, yellow
4 flat Peeps, pink

Wash and dry the glass jar.  
Squeeze four yellow peeps into opposite sides.
 
Now squeeze the two pink ones between the yellow on either side.
 
Fill by alternating plain and peanut M&M's in the whole jar.  This will fill a 5" cube jar to the top.
 
Now sit back and wait for the smarty pants who asks "what if I want to eat a Peeps"?

Then just do what I did and point to the kitchen where the extra peeps are and say "don't even think about it"!

Enjoy!
~Easter Hugs~
Michelle

Linking up with:


Saturday, March 31, 2012

Swiffer Duster Refill Pads

I saw this on Pinterest the other day and thought I can make these!  They are totally cute fleece refills for the Swiffer Duster.  They can be reused over and over because fleece can be washed when they are to dusty to use.

Mine aren't quiet as cute or perfect as the ones selling on Etsy but that's what gives them personality and they sure are handy.  Now you too can make them at home. Here are the easy directions I came up with.
Here's what you need:

Anti pill fleece, any color, at least 1/4 yard
sewing machine or you could hand stitch these too
sharp scissors
Swiffer Duster handle
old CD
straightedge ruler
1 piece cardstock 8-1/2" x 11

First I got a piece of 8-1/2" x 11" and made my template by using an old CD to make the half circle at the top and used a ruler to draw straight lines for the sides.  The template measures 7-1/4" (center) tip to end, 4-3/4" wide with the center slots being 4-1/2" high and 3/4" each (x2) wide.
 
Next, keeping the selvage (side with edge) sides lined up, fold the fleece so you have 4 pieces thick.  Place template on top of fleece and cut around the template.
 
Taking the top two pieces; keeping them together, sew together 1/4" from straight edge bottom.
Do this to the next two pieces also so that you have two pieces each.
 
Using a pencil and a straight edge ruler mark dots where the center sewing is going to start and end.
Then, stating at the straight edge end, sew up to the top dot on one of the sides then turn and sew across the top

 
then turn and come back down.  Now sew up the middle starting 1" up from the end to create two holes for the handle to slide into.
  
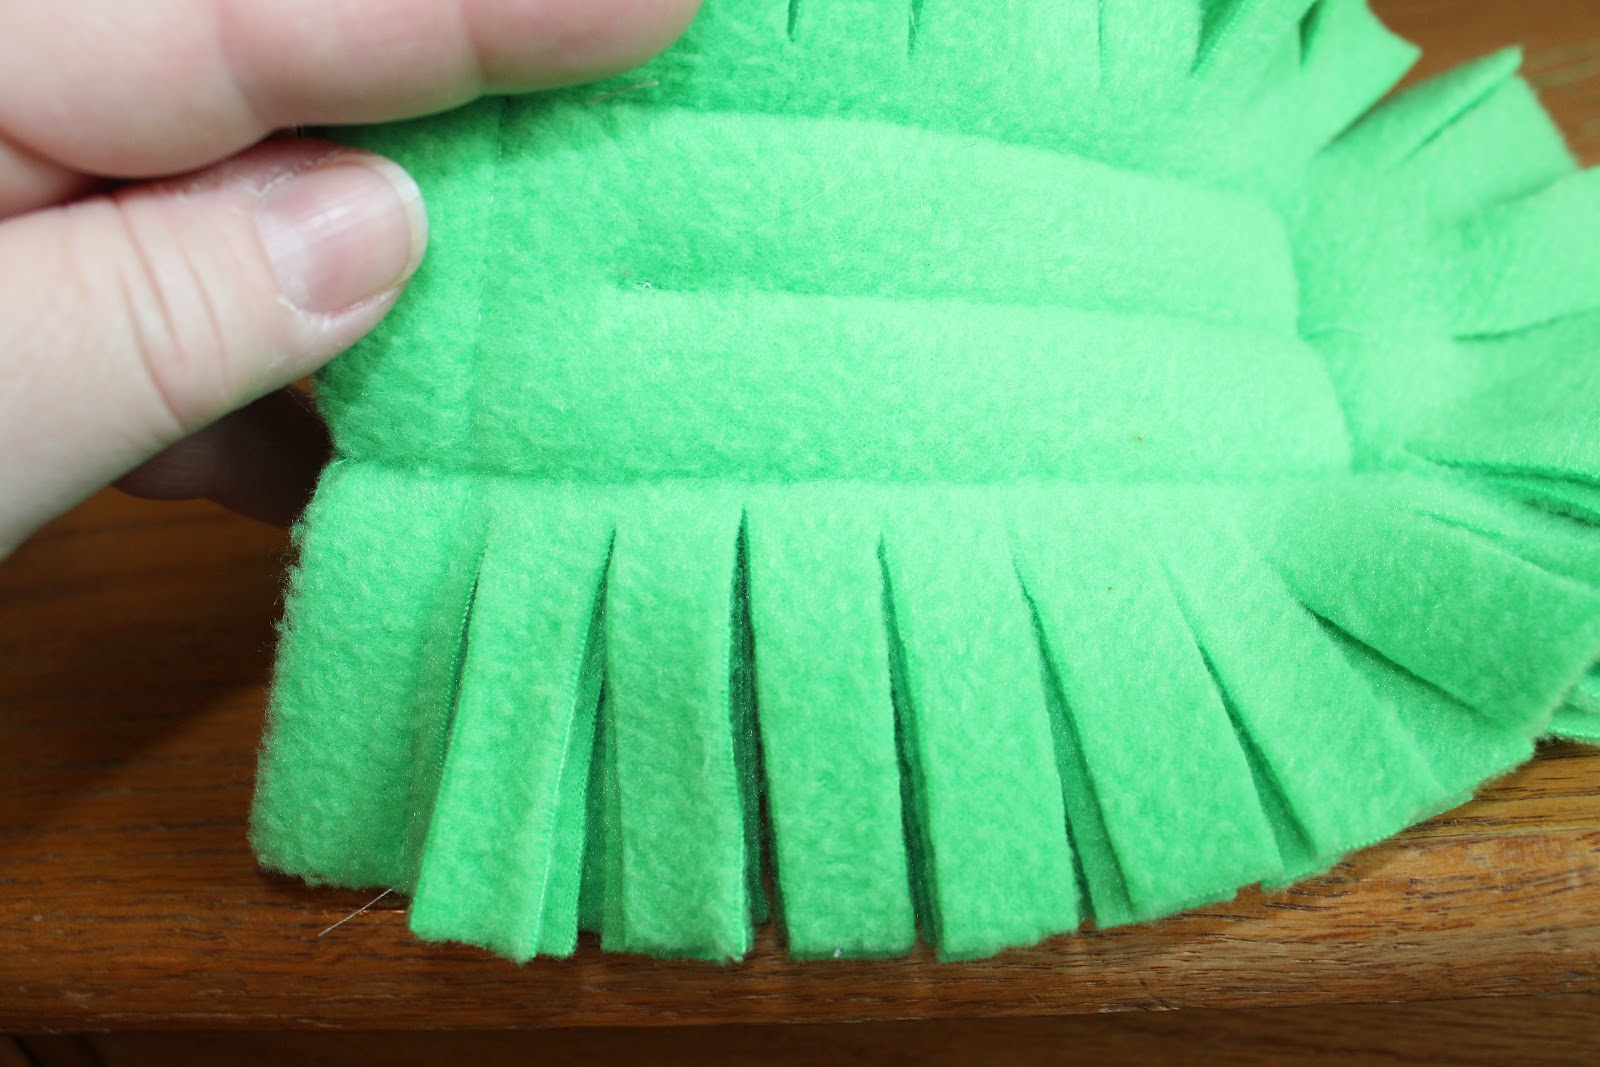
Test the handle to make sure it fits in to the slots before you cut the fringe.  Next make 1/2: cuts almost all the way to the stitching to make the fringe.  Be careful around the round edge, don't cut to close to the sides at an angle. 
 
                Tada!   Homemade Swiffer Refills!

If you have any questions about this project, please feel free to contact me.  I am not a professional seamstress and usually just wing it while sewing.  But these came out great!  

Enjoy!
~Hugs~
Michelle

Linking up with

Monday, February 27, 2012

Make-up Brush Jar

I found this idea on Pinterest the other day and thought it would be a great gift for my daughter.  I was super fun and easy to make and I only needed three things.

Here's what you need:
1 - jar 3-1/2" x 4-1/4" (I bought this at Michael's)
1- 8 - 12 ounce bag of acrylic discs any color I picked clear because that's what they had
1 - 18 - 20" piece of ribbon (If you use a bigger jar just add a couple of inches to the ribbon)

Wash and dry the jar
 
Pour the discs into the jar filling it 3/4 of the way full.
Tie the ribbon around the jar and either tie it in a knot or a bow and trim the ends.  I chose a knot.
 
Front and back view.
Fill with as many or a few brushes as you like.
  
Here's a few.....................Here's my daughters

This was a super fast and easy gift.  I will be making more of these to give in the future.

Enjoy!
~Hugs~
Michelle

Linking up with Fusion Friday's at Jennifer Cooks


Fleece Tied Blanket

Lately I haven't been posting any crafts because I've been cooking and baking up a storm.  I did actually make some crafts over the holidays and I thought I would show you what I made.  I got the directions for this Fleece Tied Blanket, which is the first one I have ever made, from my friend Teresa after seeing the one she made my cousin.  It was way easier than I thought and I have made a total of 6 since October.  I will be making more of these for Birthday's and Holiday's this year because they are a wonderful gift to receive.  My husband even made one for his brother for his birthday too.

Here's what you need:
For an adult :
2-1/2 yards of two different fabrics (or the same fabric works too)
a pair of REALLY sharp fabric scissors
a large enough space to lay the fabric out flat

For a child under 4 feet tall:
1-1/2 yards of fabric


First lay the fabric out with the pattern sides facing out on both sides (the way the blanket with look after it is tied) If you aren't sure which side is up check the selvage edge for the writing and just make sure you can read it facing you.
Make sure you have no wrinkles in either fabric.  I used my bed to lay this on, but I trusted myself NOT to cut my blanket.  You might want to use the floor or even a large table.  The trick is to NOT have to move the fabric once you start cutting.
Next, cut and trim (through both fabrics at the same time) all four sides so that both pieces of fabric are the same length and width.  
 
Cut a piece of paper in a 4 x 4 inch square and place on the corner of the fabric and trim around it.  This is what gives the blanket the rounded edges once it is tied.
Next start cutting the fringe.  I made my cuts 1" to 1-1/4 inches wide and approximately 3-1/2 inches long.  You will do this for all four sides.
I am showing this side because the yellow was easier to see the cuts.
Once you are done with cutting the whole blanket you can start your tying.  It doesn't matter which side you start with just pick one corner and go around the whole blanket one way.
 
The pattern I use will end the blanket with the opposite color fabric sticking up on the ties.

Take the top fabric and cross over the back piece and pull the top fabric through and up.  Now, to knot it take the bottom fabric and cross over the top and pull it through and up giving it a little tug but not too much as it will continue to rip the fabric where the cuts are made.  You want a firm knot but not really tight where it pulls on the blanket.  This should end with the bottom piece of fabric at the top.  It took me a couple of times to get the hang of doing this.  Practice, practice, practice.
 
Once you get the flow it will go pretty fast.  It usually takes between 1-2 hours from start to finish.
 
Here is the blanket after it was completed.  The second one is the one I gave a friend for her birthday.

I hope you'll give Fleece Tied Blanket making a try it was fun and everyone loves their blankies!

Enjoy!

~Hugs~
Michelle

Linking up with Fusion Friday's at Jennifer Cooks